IPSec Configuration: Difference between revisions
No edit summary |
No edit summary |
||
| (One intermediate revision by the same user not shown) | |||
| Line 40: | Line 40: | ||
Change the Lan IP as per your requirement, here you can see the default IP 192.168.10.1 After change click on save and update button. | Change the Lan IP as per your requirement, here you can see the default IP 192.168.10.1 After change click on save and update button. | ||
[[File:IPsec Type Settings.png|left|frameless|505x505px]] | [[File:IPsec Type Settings.png|left|frameless|505x505px]][[File:IPsec_Type_Settings_1.png|frameless|505x505px]] | ||
[[File: | |||
Please open the IPSec VPN and enter the above parameter after that clicking on the save and update button Phase I and Phase II should be according to server policy... | |||
Latest revision as of 11:34, 30 July 2024
To log in to SILBO by connecting the router to your laptop or desktop via LAN or using Wi-Fi, please follow the steps below.
Connecting via LAN:
Connect your laptop's LAN port to one of the router's LAN interfaces. Ensure that you select any LAN interface (there are two available) while making sure the WAN interface is not used.
How to connect with the SILBO application
Once the LAN connection is established between the device and the laptop or the desktop
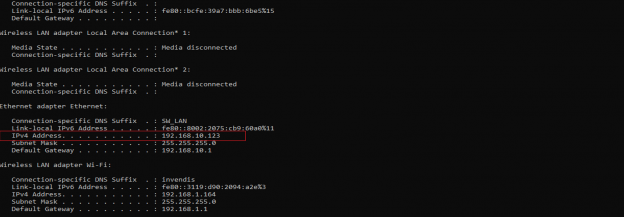
Please open the command prompt and ping go get the ip config of that device.
Type the command Ipconfig
It will provide the Ip address/url of that device through which the application can be accessed.
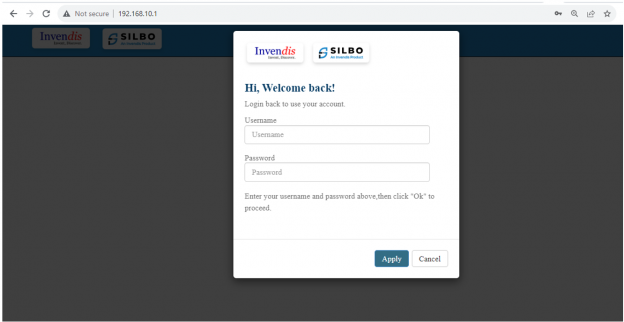
Open the web browser and type the IP address in the URL.
It will show the log in page of the application.
Give the valid credentials for the username and password to login to the application page.
Once the user credentials are provided it will direct to the landing page of the application.
For LAN IP _--
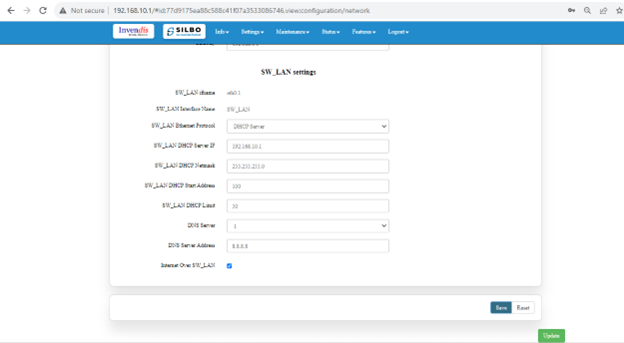
Navigate to Setting>>Network>>Ethernet
Change the Lan IP as per your requirement, here you can see the default IP 192.168.10.1 After change click on save and update button.
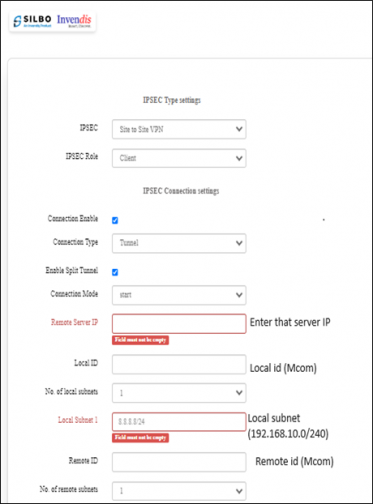
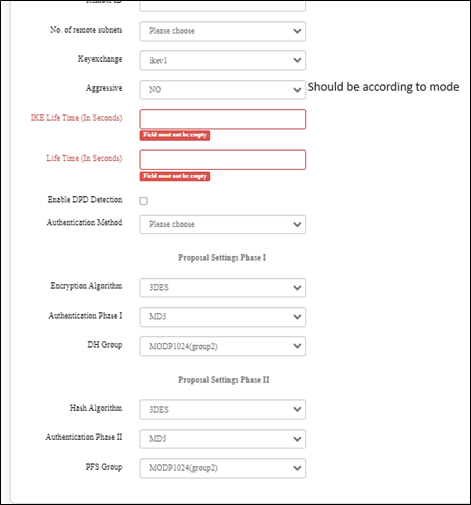
Please open the IPSec VPN and enter the above parameter after that clicking on the save and update button Phase I and Phase II should be according to server policy...


