(IA44B)Modbus to MQTT: Difference between revisions
(Created page with "'''Prerequisite:''' * Modbus RTU Slave (Used ModSIM application as slave in this manual) * USB to RS485 converter. * SILBO gateway (IA44B is used in this manual) * MQTT Broker (Hivemqtt) * SIM card with active internet Note: This document is prepared using SILBO 1.16_1.13_RC4 FW version & App manager FW as 1.06_RC3 build 1.02 == '''Chapter 1: SILBO gateway Network configuration''' ==") |
No edit summary |
||
| Line 10: | Line 10: | ||
== '''Chapter 1: SILBO gateway Network configuration''' == | == '''Chapter 1: SILBO gateway Network configuration''' == | ||
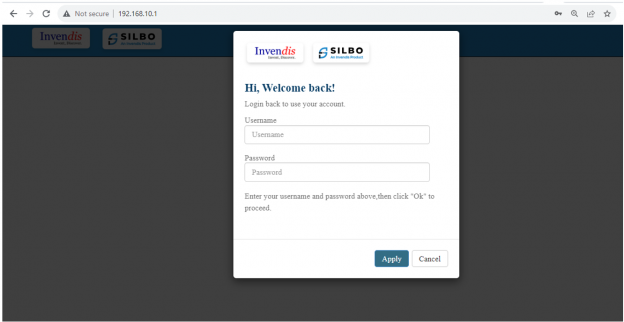
Login to router using default IP 192.168.10.1 and default credentials admin/admin. | |||
[[File:Log In.png|frameless|624x624px]]Once login we can see the FW version. | |||
[[File:Firmware Version Dashboard.png|frameless|624x624px]]To change the IP address of router, Navigate to Settings>>Network and change “SW_LAN DHCP Server IP” save and update. | |||
[[File:SW LAN DHCP Server IP.png|frameless|624x624px]] | |||
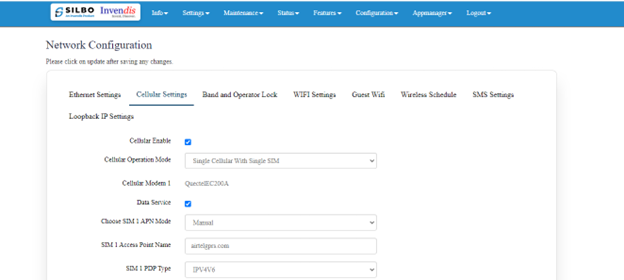
To change Cellular settings for special APN SIM or M2M SIM navigate to Settings>>Network>>Cellular settings. | |||
Choose actual APN for SIM1 and SIM 2 in “SIM 1 Access Point Name” from “airtelgprs.com to an actual “APN name”. | |||
[[File:Cellular settings.png|frameless|624x624px]] | |||
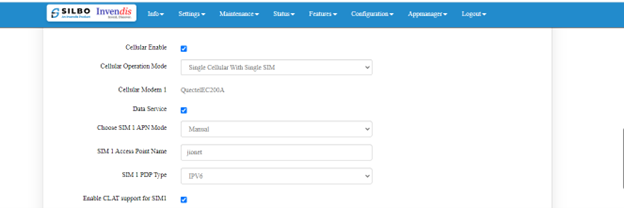
For JIO SIM in case if it is 5G SIM where IPv6 is only supported make below changes. | |||
APN name of JIO. | |||
PDP type should be changed from IPv4V6 to IPv6 only and enable “Enable CLAT support for SIM1” for the SIM card as shown. | |||
Save and update the settings once done. | |||
[[File:Enable CLAT support for SIM1.png|frameless|624x624px]] | |||
== '''Chapter 2: Modbus RTU Master Configuration''' == | |||
=== '''1. Prepare Modbus slave.''' === | |||
Install any Modbus slave simulator, here ModSim32 is used. | |||
Link to download: <nowiki>https://www.win-tech.com/html/demos.htm</nowiki> | |||
Install the ModSIm32 application and connect USB to RS485 to PC/System. | |||
Check the com port in the system in device manager. | |||
[[File:Prepare Modbus slave.png|frameless|624x624px]] | |||
Configure ModSim32 as shown and remember the serial configuration and Modbus configuration. | |||
the serial and Modbus configuration is useful during Modbus RTU master configuration. | |||
=== '''2. Configure Modbus RTU master as per the slave configuration''' === | |||
Navigate to Configuration>>Modbus configuration to configure Modbus RTU Master. | |||
Click on Add Device as shown. | |||
[[File:Configure Modbus RTU master as per the slave configuration.png|frameless|624x624px]] | |||
Follow the configuration in the new pop-up window as shown below image. | |||
Note the Modbus and serial configuration is taken from our modSIM32 configuration. | |||
[[File:Modbus and serial configuration .png|frameless|624x624px]] | |||
Edit the configuration to do the register mapping. | |||
There are 2 different configuration options. | |||
Both options do allow giving a Tag name, but Default mapping is good for data sending in CSV or in fixed JSON string format. For editable JSON format Custom mapping can be used. | |||
'''Default Mapping''' allows giving name to the segment and allow choosing a datatype for all the Registers. | |||
'''Custom Mapping''' allows configurating Tag name and datatype for each register separately. | |||
[[File:Register mapping.png|frameless|624x624px]]To update the configuration click on “Update Device” | |||
[[File:Update Device Register maping.png|frameless|624x624px]] | |||
Revision as of 12:36, 29 July 2024
Prerequisite:
- Modbus RTU Slave (Used ModSIM application as slave in this manual)
- USB to RS485 converter.
- SILBO gateway (IA44B is used in this manual)
- MQTT Broker (Hivemqtt)
- SIM card with active internet
Note: This document is prepared using SILBO 1.16_1.13_RC4 FW version & App manager FW as 1.06_RC3 build 1.02
Chapter 1: SILBO gateway Network configuration
Login to router using default IP 192.168.10.1 and default credentials admin/admin.
 Once login we can see the FW version.
 To change the IP address of router, Navigate to Settings>>Network and change “SW_LAN DHCP Server IP” save and update.
To change Cellular settings for special APN SIM or M2M SIM navigate to Settings>>Network>>Cellular settings.
Choose actual APN for SIM1 and SIM 2 in “SIM 1 Access Point Name” from “airtelgprs.com to an actual “APN name”.
For JIO SIM in case if it is 5G SIM where IPv6 is only supported make below changes.
APN name of JIO.
PDP type should be changed from IPv4V6 to IPv6 only and enable “Enable CLAT support for SIM1” for the SIM card as shown.
Save and update the settings once done.
Chapter 2: Modbus RTU Master Configuration
1. Prepare Modbus slave.
Install any Modbus slave simulator, here ModSim32 is used.
Link to download: https://www.win-tech.com/html/demos.htm
Install the ModSIm32 application and connect USB to RS485 to PC/System.
Check the com port in the system in device manager.
Configure ModSim32 as shown and remember the serial configuration and Modbus configuration.
the serial and Modbus configuration is useful during Modbus RTU master configuration.
2. Configure Modbus RTU master as per the slave configuration
Navigate to Configuration>>Modbus configuration to configure Modbus RTU Master.
Click on Add Device as shown.
Follow the configuration in the new pop-up window as shown below image.
Note the Modbus and serial configuration is taken from our modSIM32 configuration.
Edit the configuration to do the register mapping.
There are 2 different configuration options.
Both options do allow giving a Tag name, but Default mapping is good for data sending in CSV or in fixed JSON string format. For editable JSON format Custom mapping can be used.
Default Mapping allows giving name to the segment and allow choosing a datatype for all the Registers.
Custom Mapping allows configurating Tag name and datatype for each register separately.


