IPsec VPN between SILBO RD44A and Fortigate firewall: Difference between revisions
(Created page with "'''Prerequisite:''' * FortiGate firewall * SILBO Router or gateway * Static Public IP on wired internet connection * SIM card with active internet Note: This document is prepared using FortiGate FW v7.0.13 & SILBO 1.16_1.13 FW version. FortiGate VPN setup Create a new IPSec tunnel via VPN -> IPSec Tunnels -> (+) Create New frameless|624x624px IPsec Wizard will open, then follow below steps: * Give a name to IPsec VPN to Identify...") |
No edit summary |
||
| Line 73: | Line 73: | ||
Once login we can see the FW version. | Once login we can see the FW version. | ||
[[File: | [[File:RD44A system .png|frameless|620x620px]] | ||
Change the IP address to required IP, in this testing we are using 192.168.11.1 IP address. | Change the IP address to required IP, in this testing we are using 192.168.11.1 IP address. | ||
Latest revision as of 09:28, 16 August 2024
Prerequisite:
- FortiGate firewall
- SILBO Router or gateway
- Static Public IP on wired internet connection
- SIM card with active internet
Note: This document is prepared using FortiGate FW v7.0.13 & SILBO 1.16_1.13 FW version.
FortiGate VPN setup
Create a new IPSec tunnel via VPN -> IPSec Tunnels -> (+) Create New
IPsec Wizard will open, then follow below steps:
- Give a name to IPsec VPN to Identify
- Select “Site to Site” and select remote device as “Cisco”
- Select “No NAT between sites” Option
- WAN IP address of a SILBO Router/gateway (As we do not have fix WAN IP, we provided a LAN IP and that will be removed later during ????????)
- Select Outgoing Interface to the one that FortiGate will be using to communicate with Remote Device that is WAN interface.
- Choose a pre-shared key and make sure you will configure in SILBO device and click next.
- Select Internal (FortiGate’s LAN) interface that you wish to use in IPsec.
- Local Subnets field will populate automatically.
- Put SILBO LAN subnet in Remote Subnets field and click on next.
Verify all the configurations as shown
In case you wish to add more tunnels you can do.
Once configuration is saved it should show as below.
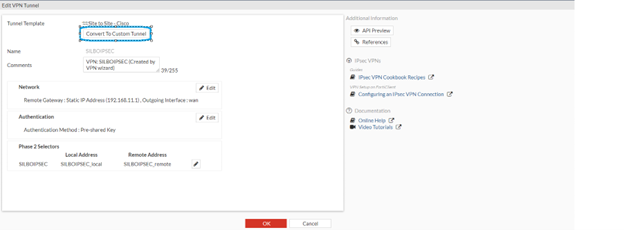
Now convert the tunnel to custom as shown below.
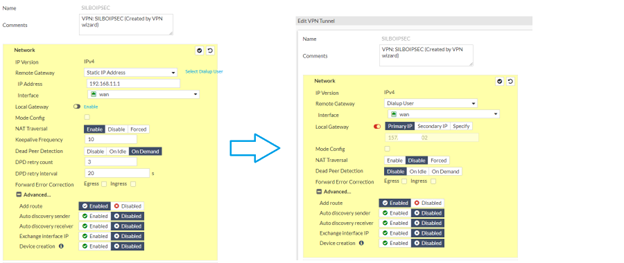
Once saved it should move to custom VPN as shown below.
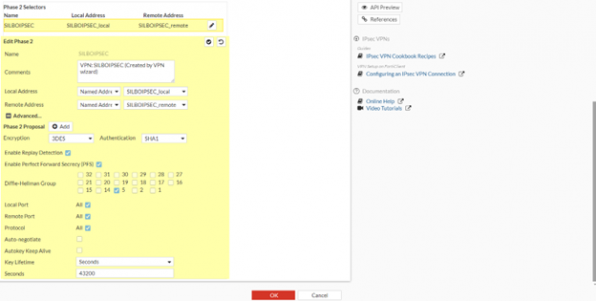
Start editing configuration further as shown in below images.
Configuring SILBO Router/gateway:
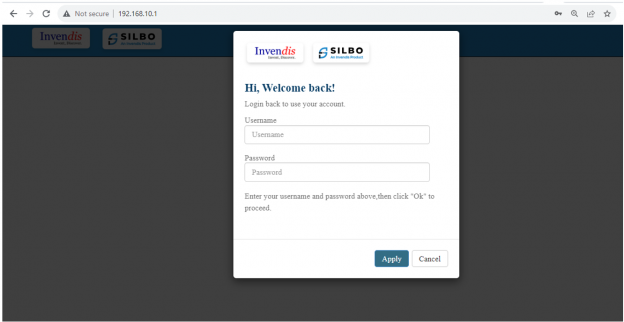
Login to router using default IP 192.168.10.1 and default credentials admin/admin.
Once login we can see the FW version.
Change the IP address to required IP, in this testing we are using 192.168.11.1 IP address.
To do that Navigate to Settings>>Network from 192.168.10.1 to 192.168.11.1 and save / update.
Upon IP changed configure VPN.
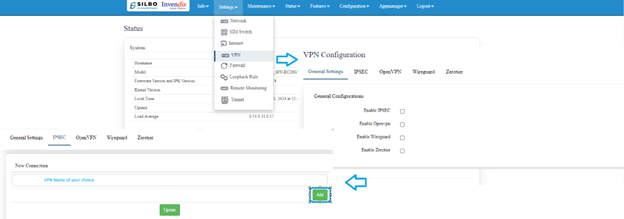
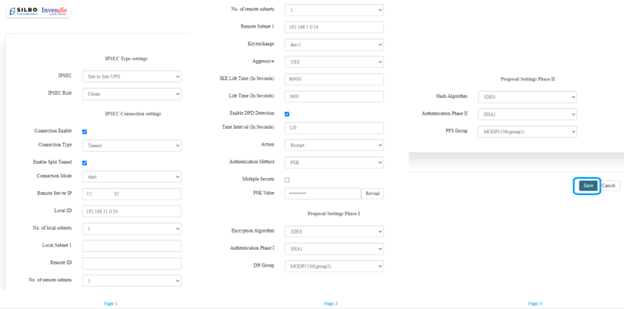
Navigate to >> Settings>>VPN>> IPsec>> and do as per below images
Once all the configuration is correctly configured and clicked on save button device will show VPN configuration >> General settings.
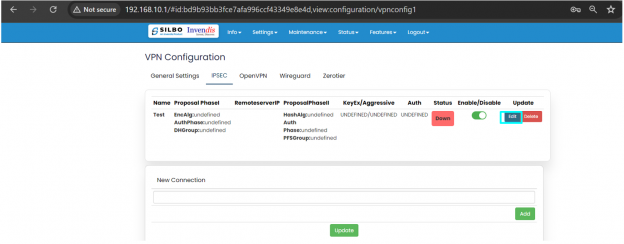
Save and then navigate to VPN>>Ipsec setting page and click on update.
In some time IPsec will come up and it can be seen as established as shown below.
Also in FortiGate it can be seen as below.
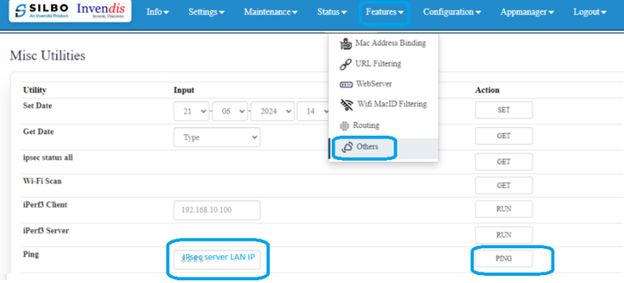
To Ping server LAN, navigate to features>>Others and give LAN IP and ping.
If the ping is not working then check the firewall side settings whether the ping is allowed or not.


