Band and Operator lock Configuration
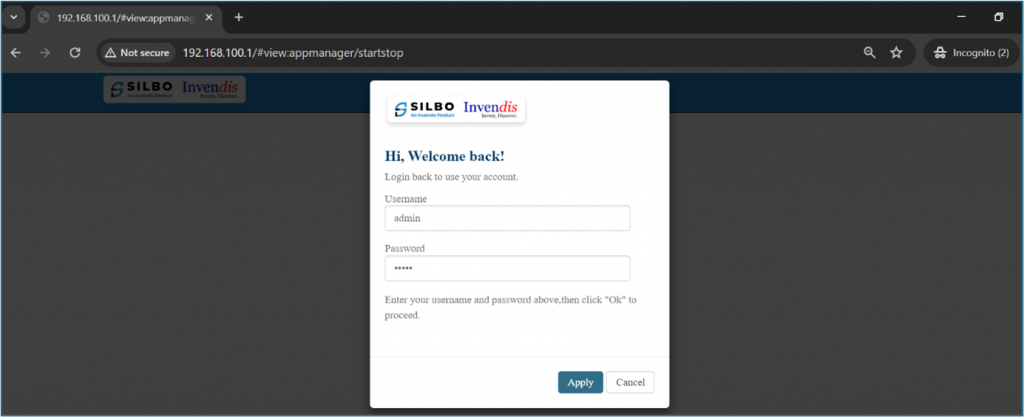
1. Login to GUI of device
Connect router to Laptop or Desktop using a LAN connection or connect over Wi-Fi.
Make sure the laptop/desktop LAN/Wi-Fi interface is in DHCP mode.
How to make LAN/Wi-Fi network interface in DHCP mode into Windows Operating system?
To configure a LAN or Wi-Fi network interface in DHCP mode on a Windows operating system, follow these steps:
Press Windows + R, type ncpa.cpl, and press Enter to open the Network Connections window.
And locate the correct LAN/Wi-Fi interface which need to be configured as DHCP client or go to below path in the system.
Control Panel\Network and Internet\Network and Sharing Center
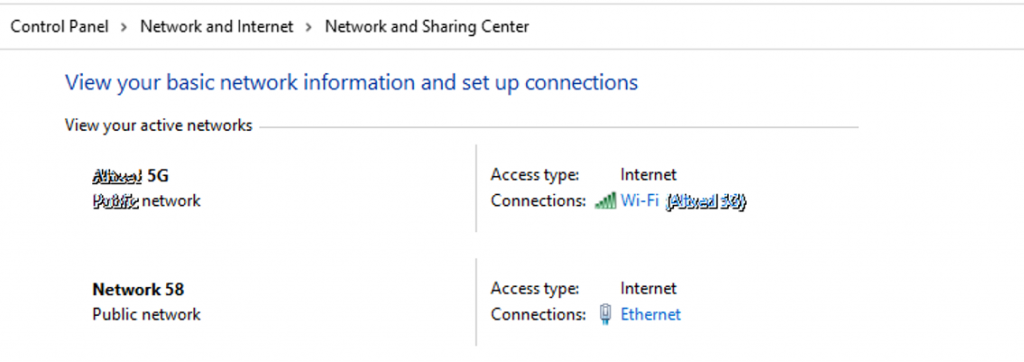 In the above image select the interface Ethernet or Wi-Fi and change the IP Version 4 (TCP/IPv4) and set in DHCP as shown in below image.
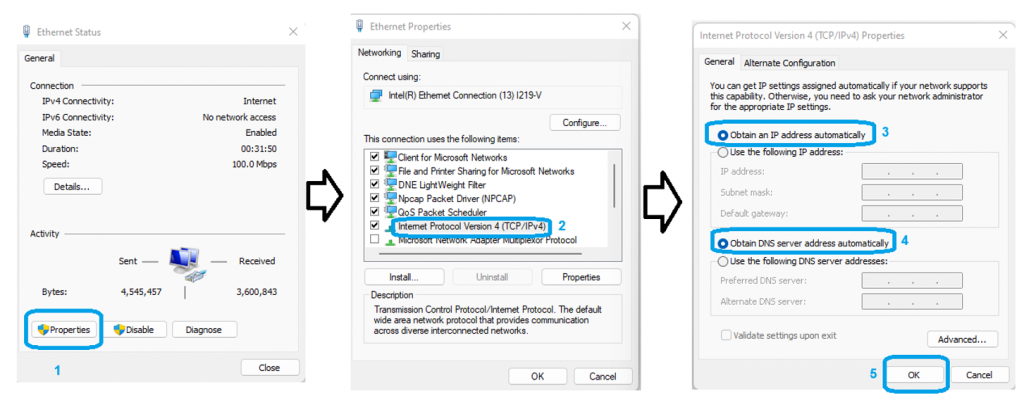 Note: Make sure the router’s DHCP server is not disabled if it is disabled then windows system should be configured with static IP “use the following IP address” option in above image.
Use default IP of router to access GUI.
For LAN it is 192.168.10.1 and for Wi-Fi it is 192.168.100.1 can be used to acces router in using any browser.
Note: For filed routers if the IP address is changed then the new IP belongs to interface should be used.
Default credentials to login are username/password : admin/admin but if the credentials are changed then use the correct credentials.
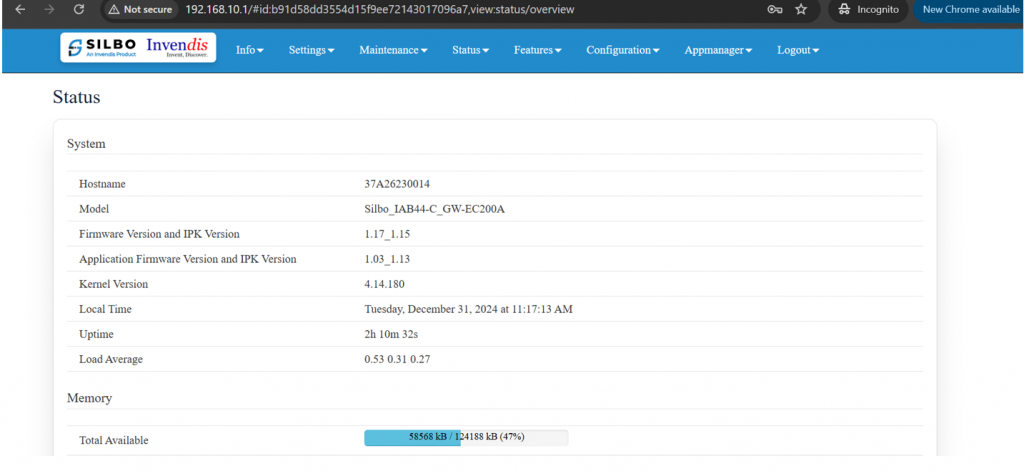 Once logged in to GUI the above screen can be seen where actual information of the device will be present.
Note: All the SILBO routers/gateway with model number RBxx, IAxx-x,RCxx, RDxx, GRDxx, RFxx,IExx etc GUI is same so the proces remains same.
Band Configuration
Band configuration refers to how specific frequency ranges (or bands) in the radio spectrum are assigned and used for mobile communication.
These bands are like "channels" that mobile networks and devices use to send and receive voice calls, text messages, and data.
Understanding how these bands work is essential for optimizing network performance and ensuring smooth communication.
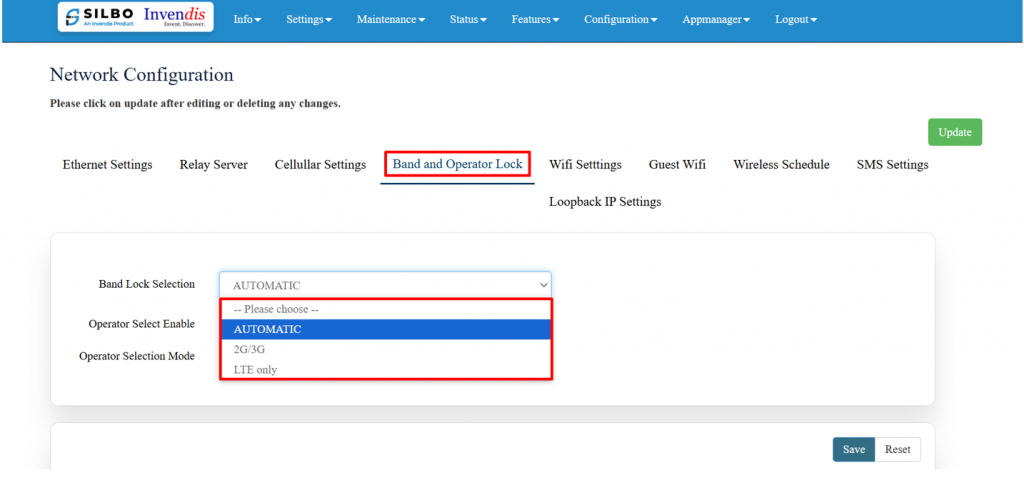
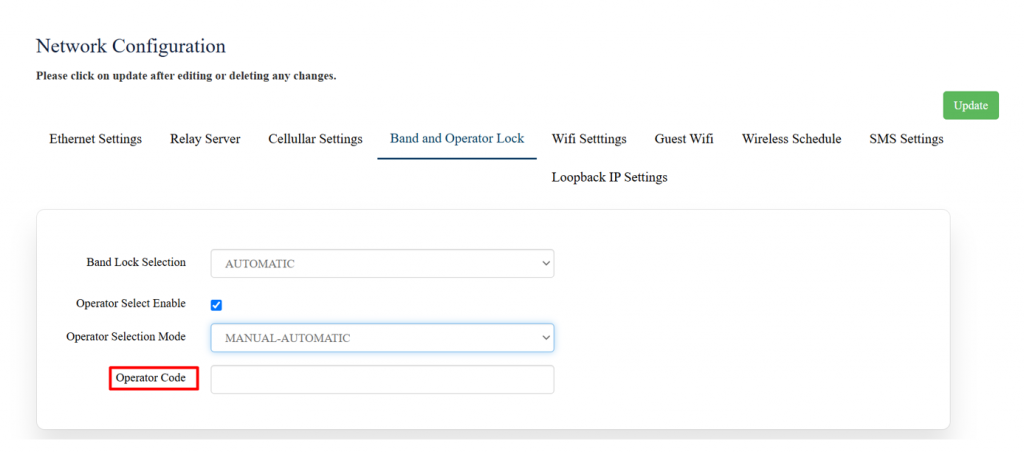
Navigate to settings >> Network >> Band and Operator Lock,
In the dropdown menu shown in the image, the options are:
- Automatic
- 2G/3G
- LTE only
The best choice depends on your use case and network environment:
1. Automatic (Preferred in Most Cases)
- Why Choose It?
Automatically selects the best available network (2G, 3G, or LTE) based on signal strength and quality.
Ideal for everyday use as it ensures stable connectivity without manual intervention.
- Use Case: Recommended for most users to ensure seamless switching between networks when moving around.
2. 2G/3G
- Why Choose It?
Useful in areas where LTE coverage is poor or unavailable.
Consumes less battery on older devices that struggle with LTE.
- Use Case:
Use this option in remote areas where only 2G/3G networks are available.
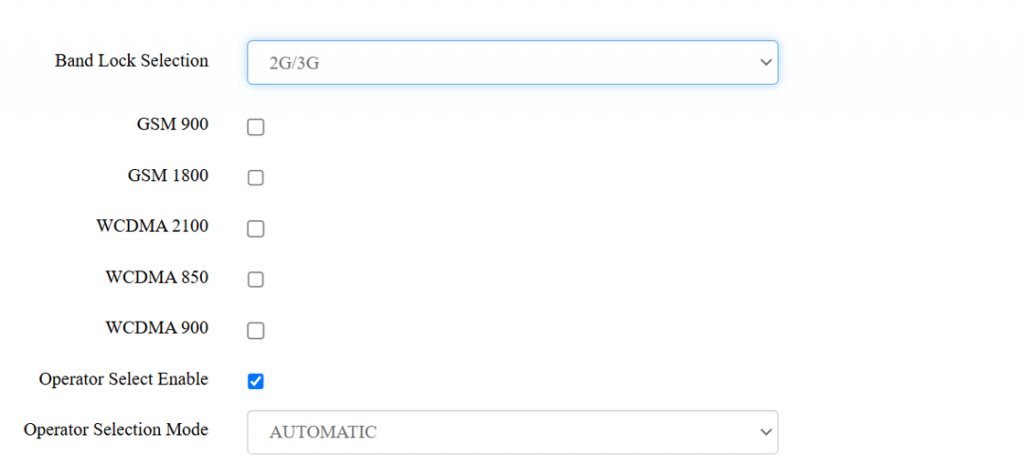 For 2G/3G, these are common recommendations:
GSM 900 and GSM 1800: Widely used globally for 2G networks.
WCDMA 2100: Common for 3G in many regions.
WCDMA 850/900: Useful for specific regions; check your carrier's compatibility.
3. LTE Only
- Why Choose It?
Ensures the fastest possible data speeds by locking the device to LTE.
Prevents fallback to slower networks like 2G or 3G.
- Use Case:
Useful for data-heavy tasks (e.g., streaming or video calls) when you’re in an area with strong LTE coverage.
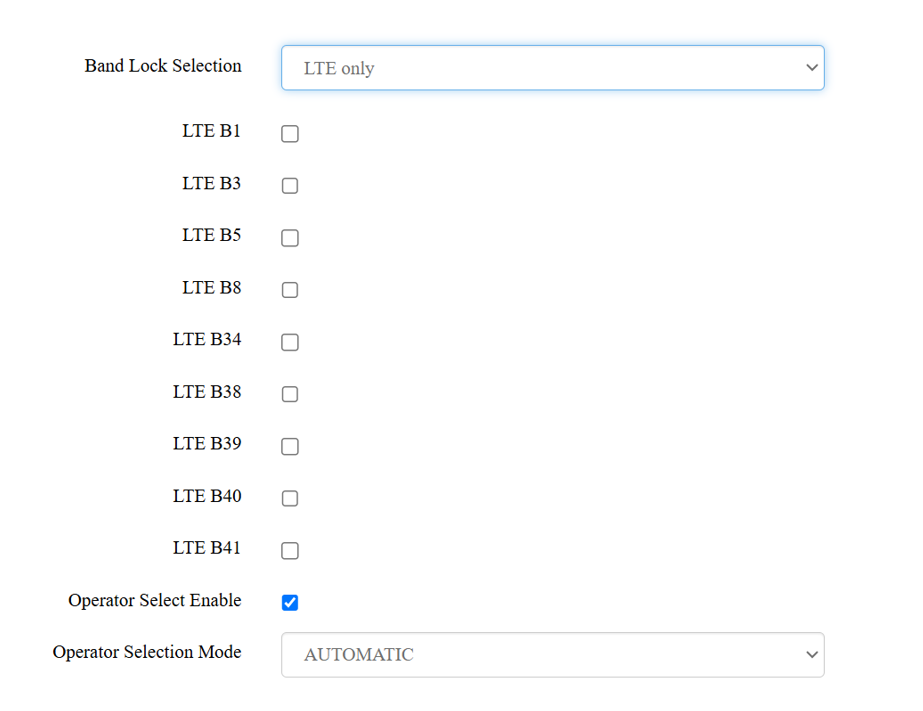
The best LTE bands to choose depends on your region and the LTE bands supported by your network carrier.
Airtel LTE Bands:
- Band 3 (1800 MHz) - Widely used for urban and suburban areas, providing high-speed data.
- Band 40 (2300 MHz) - Offers faster speeds but has a shorter range, often used in urban areas.
- Band 5 (850 MHz) - Used for better coverage in rural or less dense areas.
Vi (Vodafone Idea) LTE Bands:
- Band 3 (1800 MHz) - Like Airtel, used for high-speed data in cities and towns.
- Band 41 (2500 MHz) - Deployed for high-speed data in specific areas, though less common.
- Band 8 (900 MHz) - Used for extended coverage in rural areas and better indoor penetration.
Operator Lock Configuration
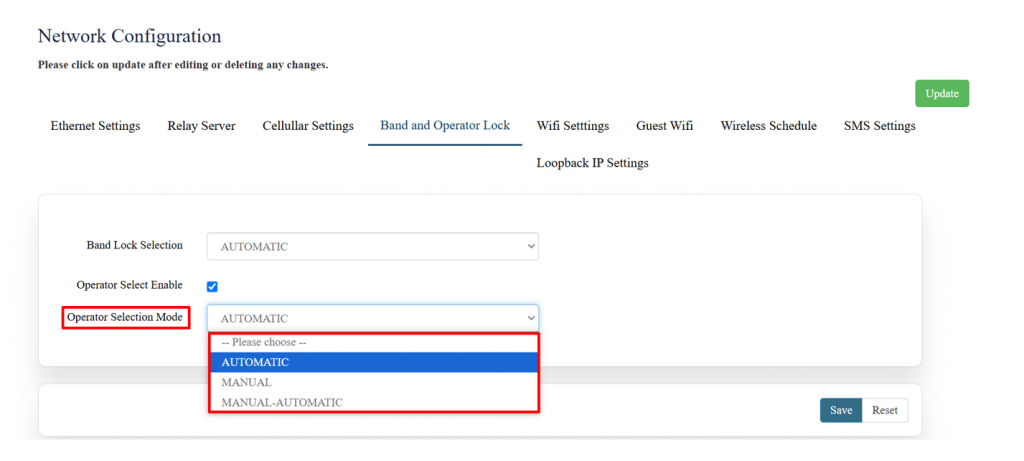
The "Operator Selection Mode" options shown in the image below are related to how a device connects to a mobile network operator.
- What it does:
- The device automatically selects the best available network based on signal strength and coverage.
2. This is the default and most used mode because it ensures seamless connectivity without user intervention.
- Use case:
1. Ideal when you're moving between areas covered by different network towers or operators (e.g., in roaming situations).
2. Ensures uninterrupted service by choosing the strongest signal available.
- Advantages:
1. Requires no manual configuration.
2. Automatically adapts to network changes or outages.
2. Manual
- What it does:
1. The user manually selects the desired network operator from a list of available networks.
2. Once a network is chosen, the device will stay connected to that network unless the user manually changes it again.
- Use case:
1. Useful if you know a specific operator provides better service in your area or want to avoid roaming charges.
2. Can be helpful in areas with multiple operators where automatic selection might not choose your preferred network.
- Advantages:
1. Gives full control over which operator to connect to.
2. Avoids unintentional switching to networks with weak signals or higher costs.
- Disadvantages:
1. Requires manual intervention if the selected network is unavailable or has poor coverage.
3. Manual-Automatic
- What it does:
1. Combines features of both Manual and Automatic modes.
2. The user initially selects a preferred operator manually. If that operator becomes unavailable, the device automatically switches to the next best network.
- Use case:
1. Useful in areas where one operator is preferred, but fallback options are needed in case of service disruption.
- Advantages:
1. Balances control and convenience.
2. Ensures connectivity even if the preferred network becomes unavailable.
- Disadvantages:
1. Slightly more complex configuration compared to fully automatic mode.
Operator Code
This tab is available either manual mode or automatic-manual mode is selected in operator selection mode as shown below.
- The Operator Code is a unique identifier assigned to each mobile network operator.
- It is usually a combination of the Mobile Country Code (MCC) and Mobile Network Code (MNC) which will be found in Status> Modem option if sim is inserted in the device.

- For example: 1. Airtel India: MCC = 404, MNC = 90 (Operator Code: 40490) 2. Vi India: MCC = 404, MNC = 22 (Operator Code: 40422) How It Works: · Select “Manual” or “Manual-Automatic” mode from the operator selection drop-down menu. · Enter the code of your preferred operator (e.g., Airtel or Vi etc). Set Manual-Automatic Mode: · The device prioritizes the selected operator based on the Operator Code. · If the specified operator is not available, it automatically connects to another compatible network. Set Manual Mode: · The device will connect only to the specified network operator. · If the operator is unavailable, no connection will be established.

