ZeroTier Download and Configuration
Login to GUI of device
Connect router to Laptop or Desktop using a LAN connection or connect over Wi-Fi.
Make sure the laptop/desktop LAN/Wi-Fi interface is in DHCP mode.
How to make LAN/Wi-Fi network interface in DHCP mode into Windows Operating system?
To configure a LAN or Wi-Fi network interface in DHCP mode on a Windows operating system, follow these steps:
Press Windows + R, type ncpa.cpl, and press Enter to open the Network Connections window.
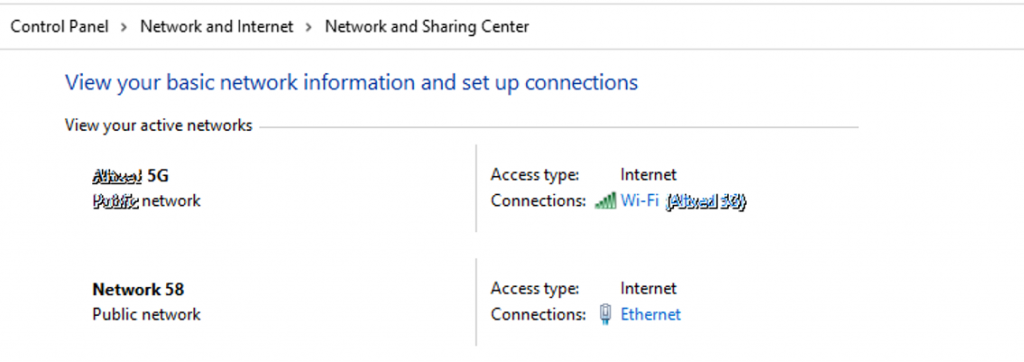
And locate the correct LAN/Wi-Fi interface which need to be configured as DHCP client or go to below path in the system.
Control Panel\Network and Internet\Network and Sharing Center
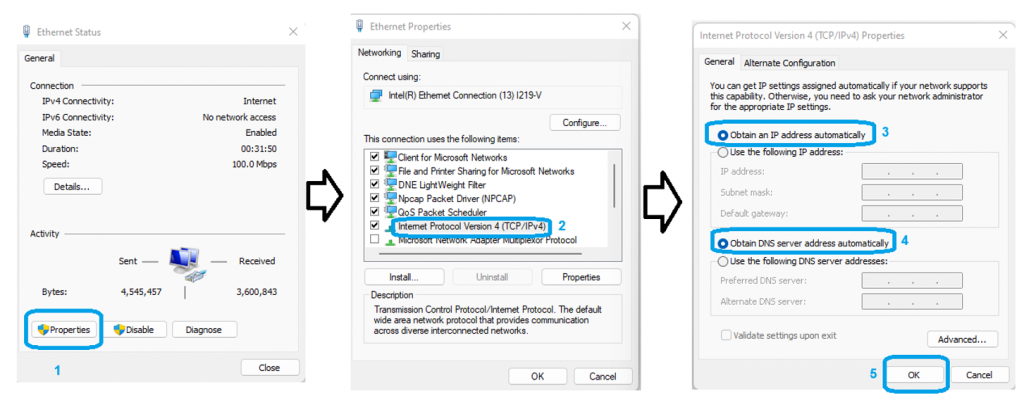
In the above image select the interface Ethernet or Wi-Fi and change the IP Version 4 (TCP/IPv4) and set in DHCP as shown in below image.
Note: Make sure the router’s DHCP server is not disabled if it is disabled then windows system should be configured with static IP “use the following IP address” option in above image.
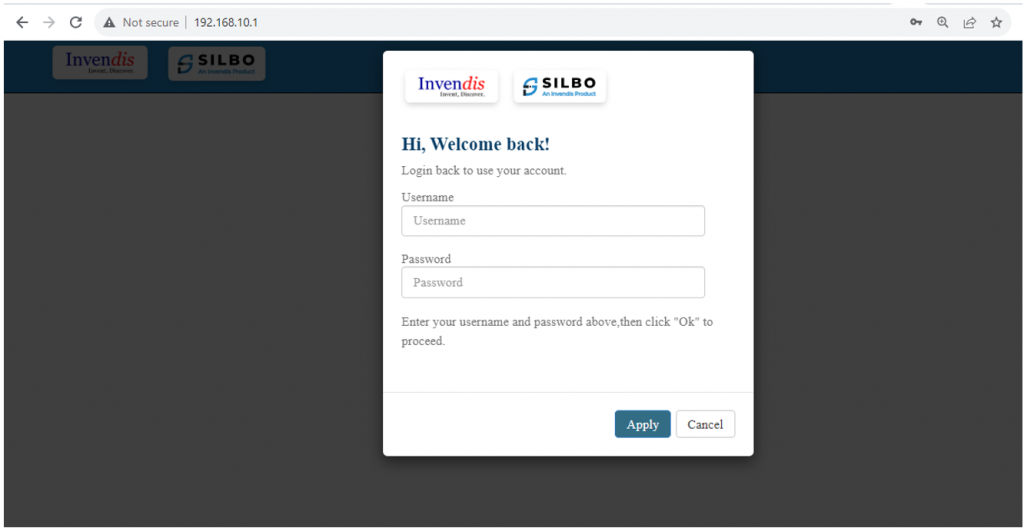
Use default IP of router to access GUI.
For LAN it is 192.168.10.1 and for Wi-Fi it is 192.168.100.1 can be used to acces router in using any browser.
Note: For filed routers if the IP address is changed then the new IP belongs to interface should be used.
Default credentials to login are username/password : admin/admin but if the credentials are changed then use the correct credentials.
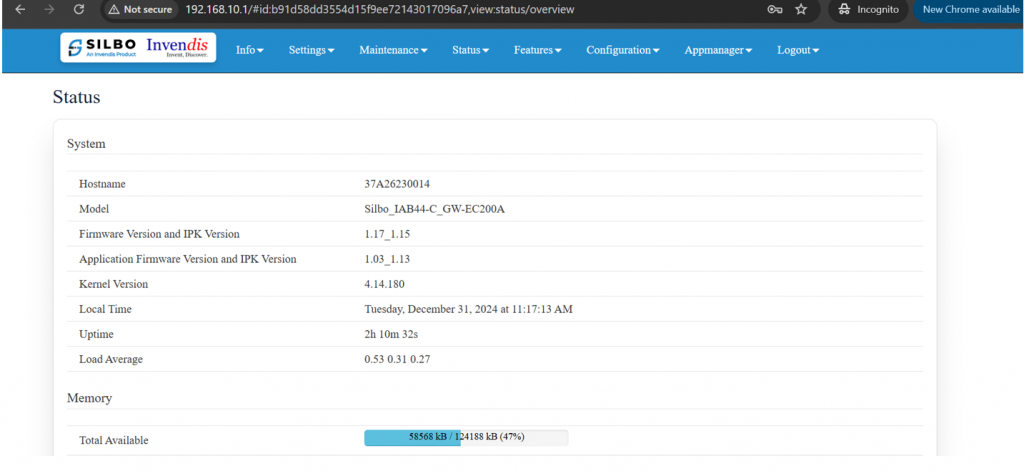 Once logged in to GUI the above screen can be seen where actual information of the device will be present.
Note: All the SILBO routers/gateway with model number RBxx, IAxx-x,RCxx, RDxx, GRDxx, RFxx,IExx etc GUI is same so the proces remains same.
Pre-requisite
- Download Zerotier_one application on PC or any other device.
- SILBO gateway (IAB44-C is used in this manual)
- SIM card with active internet. In case of M2M sim card, allow traffic through VPN by contacting your ISP.
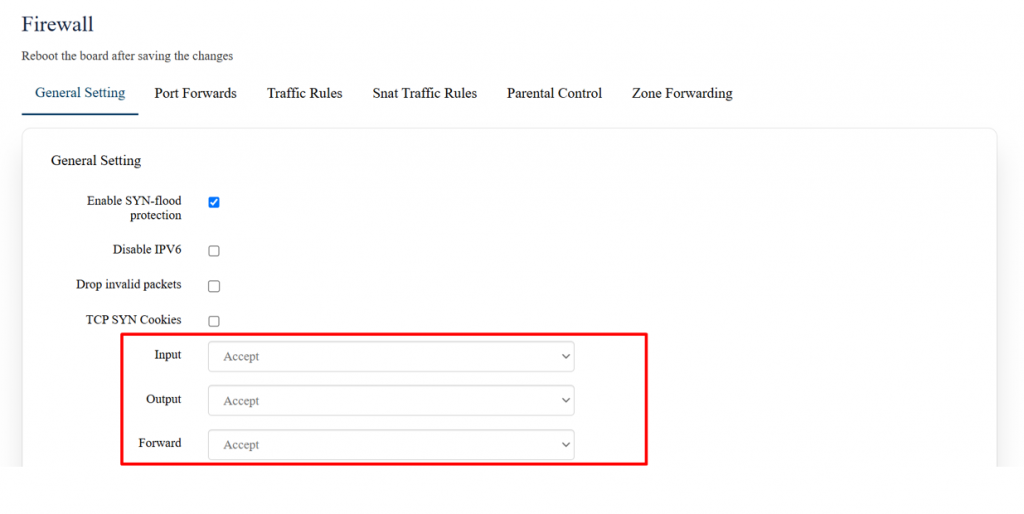
- Navigate to Settings > Firewall, accept all 3 fields from the drop-down menu which is reject by default and save. This will allow incoming traffic from zerotier.
Setup ZeroTier on PC
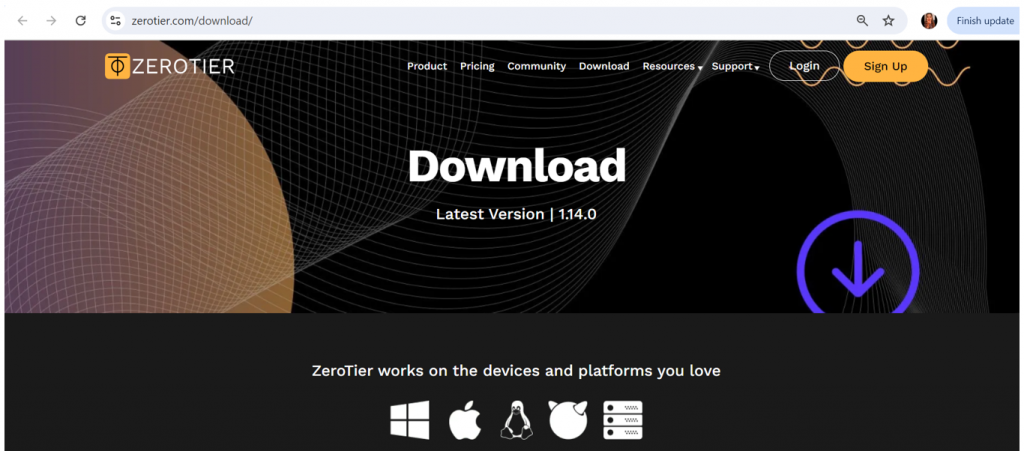
Visit the ZeroTier website and download the latest version for your operating system (Windows, macOS, Linux, iOS, Android).
Create a zerotier account to connect to our router.
Click on ‘Sign Up’ tab as seen in the image above, sign up page will appear as shown below.
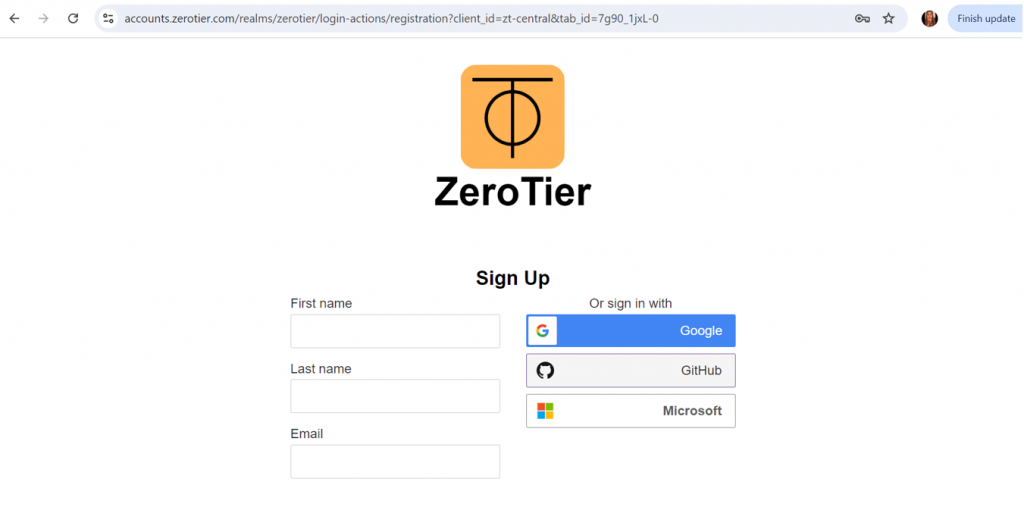 Login into your ZeroTier account to access the ZeroTier Central management console.
Create a Network
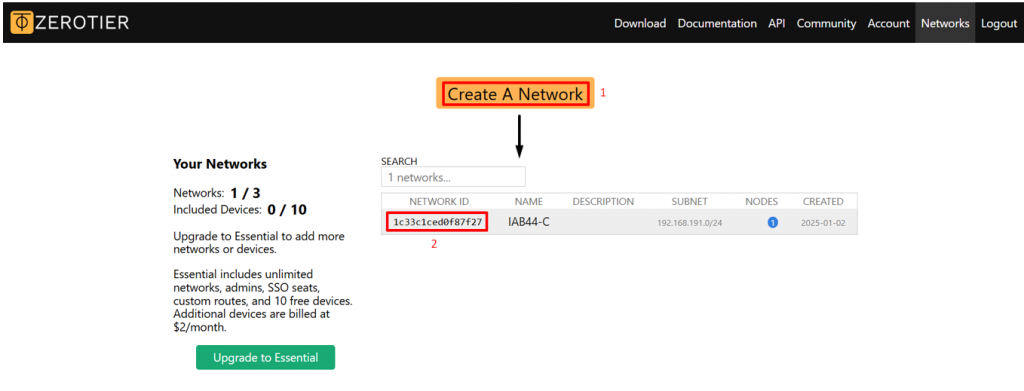
In ZeroTier Central, click on "Create a Network".
A unique 16-digit network ID will generate for your new network.
Configure the Network
Name:
A descriptive name for easy management.
Decide if your network is private (requires approval to join) or public (anyone with the network ID can join).
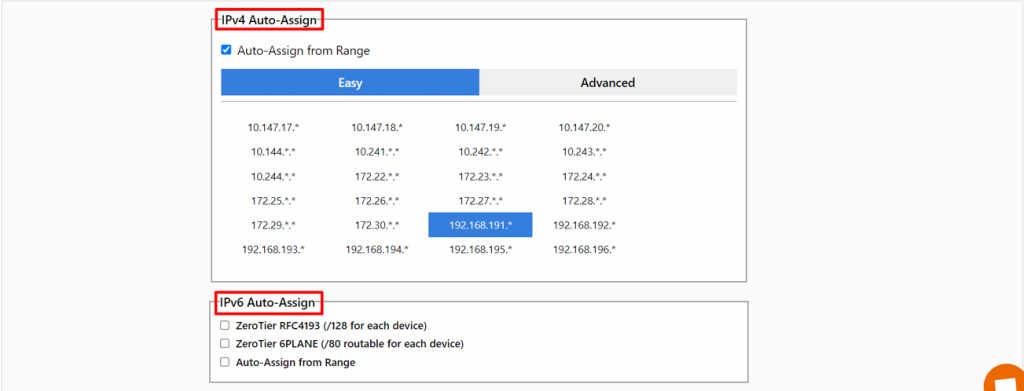
IPv4/IPv6 Addressing:
Set IP address ranges for your network devices.
Members:
Manage members and set permissions.
Copy the 16-digit unique Network ID and paste it in the router from web UI page.
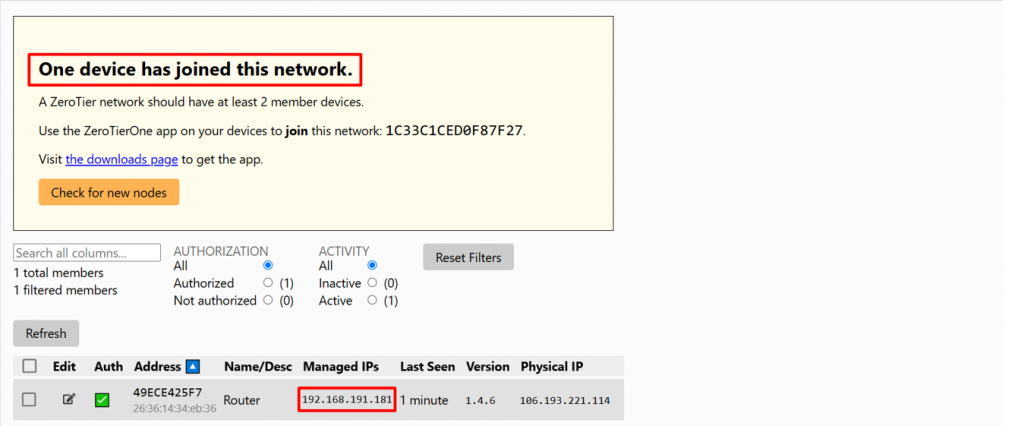
Once the router connects to the network, pop-up will appear in this section as shown below.
NOTE:
Once your router connects to the network, an IP should generate in managed IPs section as shown above.
Physical IP should be generated as well for successful connection.
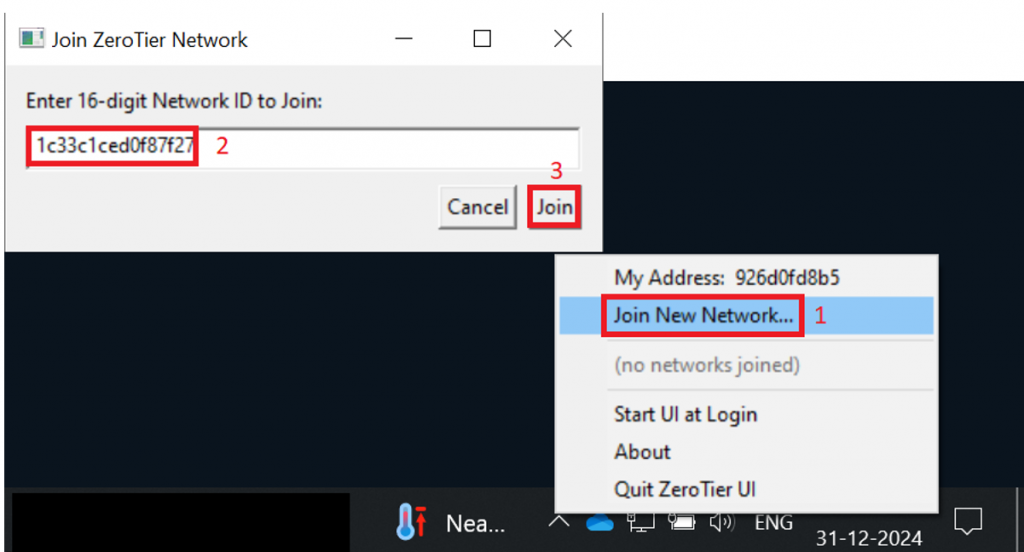
Connect your PC or any other device to this Network via Zerotier one Application downloaded on PC or other device.
Simply copy-paste your network id and connect as shown below.
This device will also get connected on the zerotier network as shown below.
Same way you can add upto 10 members in one single network.
ZeroTier VPN
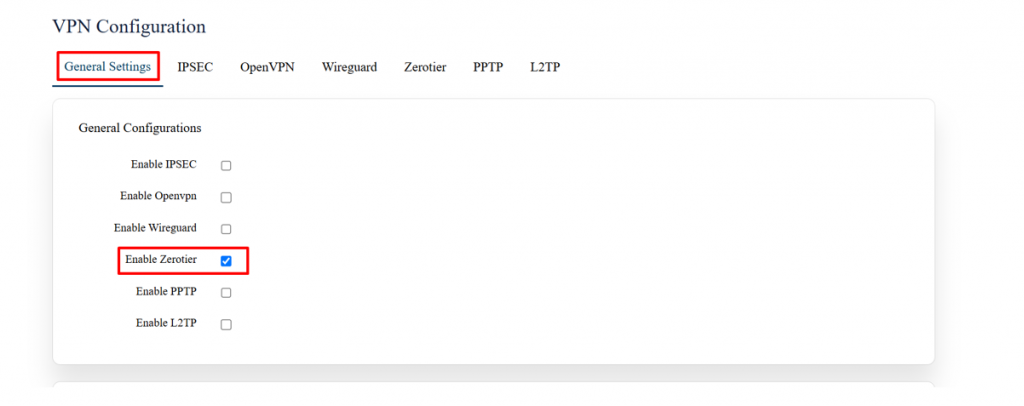
Navigate to settings => VPN,
In General settings, enable zerotier and save.
In Add New Configuration,
Give a name (Ex: Test) and ADD.
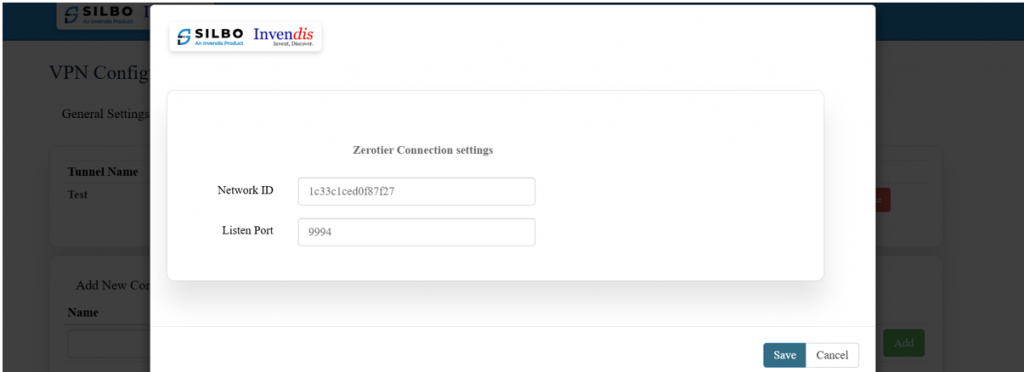
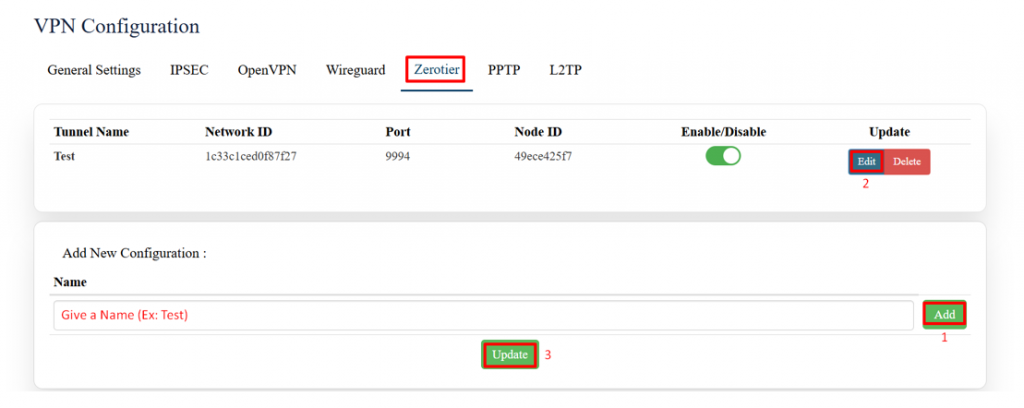 EDIT and paste Network ID and add port number as shown.
Save and update the page.
Upon update, NodeID will generate, which is the unique number to identify your router.
Cross-verify this NodeID in Zerotier central members section to know that the router has successfully been added to the network.
Test the Connection
Before accessing the router, add routes in zerotier central,
Open ZeroTier central, in the managed routes section, add the newly generated IP address (via) and the destination IP address (Ex: 192.168.10.0/24) and submit.
 Note: Before accessing the routers webpage from any device (laptop/phone) make sure your device is not connected to the router to avoid looping of the networks.
Ping Test:
Ping the new generated IP (192.168.191.181 in this case).
If the connection is made successfully, you will be able to ping this IP remotely from your PC which has also been added to the zerotier network.
Access the Webpage:
A ZeroTier network has been created between source and destination, now you can add multiple nodes in the same network and access one device from another device.

