OpenVPN Client to Client Connection
1. What is OpenVPN (tun)?
OpenVPN is an open-source software application that implements virtual private network (VPN) techniques for creating secure point-to-point or site-to-site connections in routed or bridged configurations and remote access facilities.
2. Prerequisites:
- OpenVPN connect installed on your device.
- You need to generate the necessary certificates and keys from open server.
- Connecting board to device:
Connect your router to your device via
- Ethernet cable:
Directly connect router port with RS45 wire to your device.
- Wireless network connection:
Connect router to your device using Wi-Fi, check device name and password on the device’s label.
- For Example: SSID: APClient_37B11241001
- PWD: 12345678
3. Login to device:
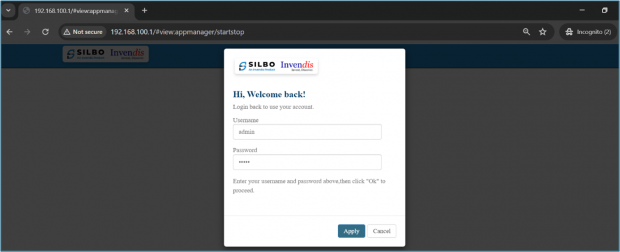
- To enter the router’s Web interface (web IU), type 192.168.10.1 into the URL field of your internet browser.
- Use the following login information when prompted for authentication.
Username: admin
Password: admin
4. Configuration:
Now we can configure OpenVPN Server and Client instances. For this example, we will be creating a TUN (Tunnel) type connection that uses the UDP protocol for data transfer and TLS for Authentication.
Here the router is server and PC is client.
Server (Router) Configuration:
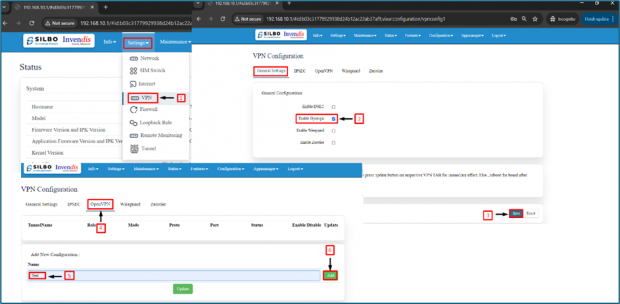
1.) Click on settings => VPN
2.) In general settings, enable VPN
3.) Save the changes made
4.) Click on OpenVPN
5.) In Add New Configurations, give a name (Test in this case)
6.) Click Add
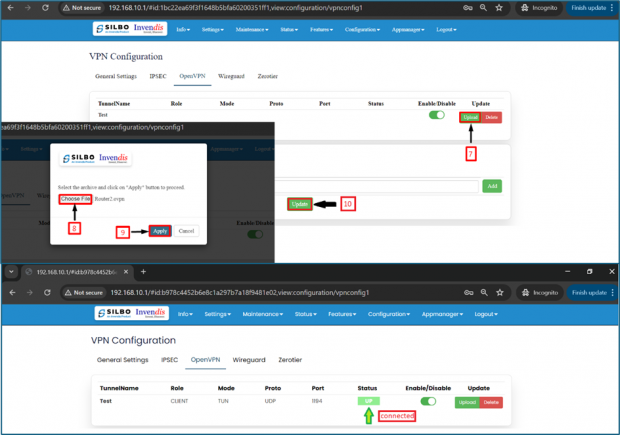
7.) Click on upload
8.) After pop-up occurs, upload the server certificate created (Server; LAN IP: 192.168.10.1; WAN (Public static) IP: 45.118.163.8) in this case.
9.) Click Apply
10.) Update the page
*Disconnect router from PC for testing purpose*
5. Testing OpenVPN Client to Client Connection:
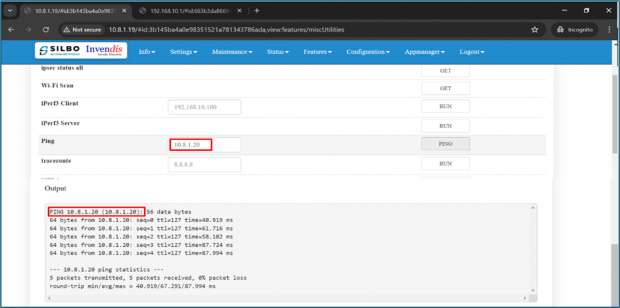
- Ping server(router) from PC, use the virtual IP assigned to your server
(10.8.1.19 in this case).
- Ping PC from Server(router), use the virtual IP assigned to PC
(10.8.1.20 in this case).
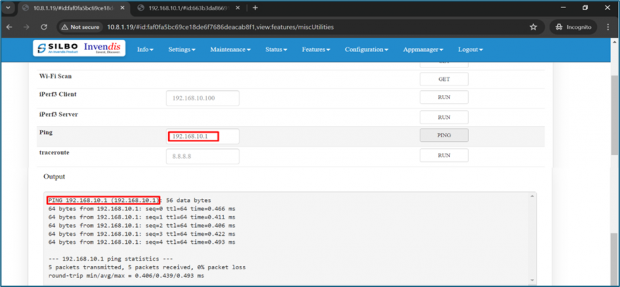
- Ping LAN_IP (192.168.10.1 in this case) from Server(router).
- To sum up, just make sure the Server and the Clients use the same parameters (same authentication, same port, same protocol, etc.).
- From the Client side, make sure to enter the correct Remote host/IP address (45.118.163.8 in this case). This is the Server's Public IP address.

