SOP for IPSEC VPN
Step 1: SILBO login
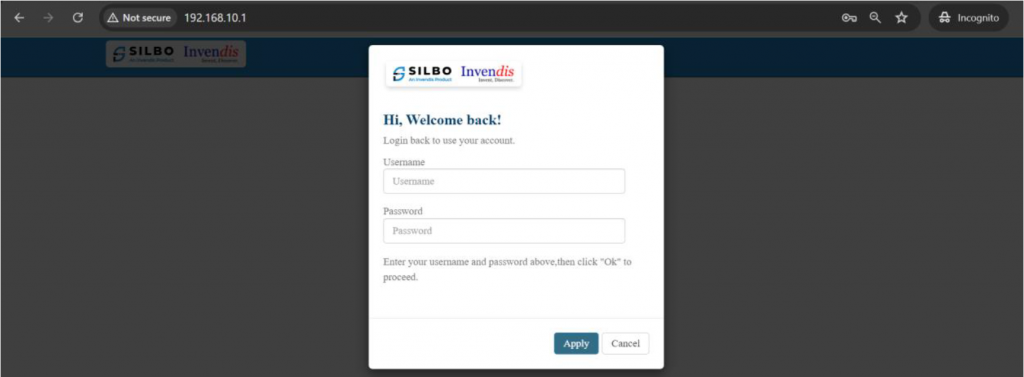
Login to router using default IP 192.168.10.1 and default credentials admin/admin.
Step 2: Firmware Upgrade
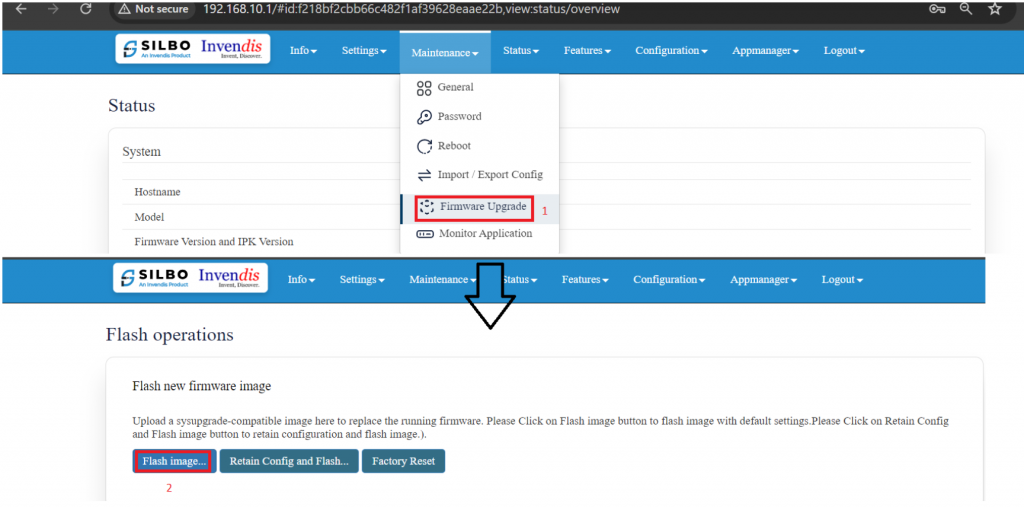
Navigate to maintenance <= firmware update, click on flash image and upload the updated firmware and click ok.
It will take atleast 2-3 mins to update the firmware and reboot the device.
SOP for IPSEC VPN
Once login again and we can see the updated Firmware version.
 Step 3: Import/Export config:
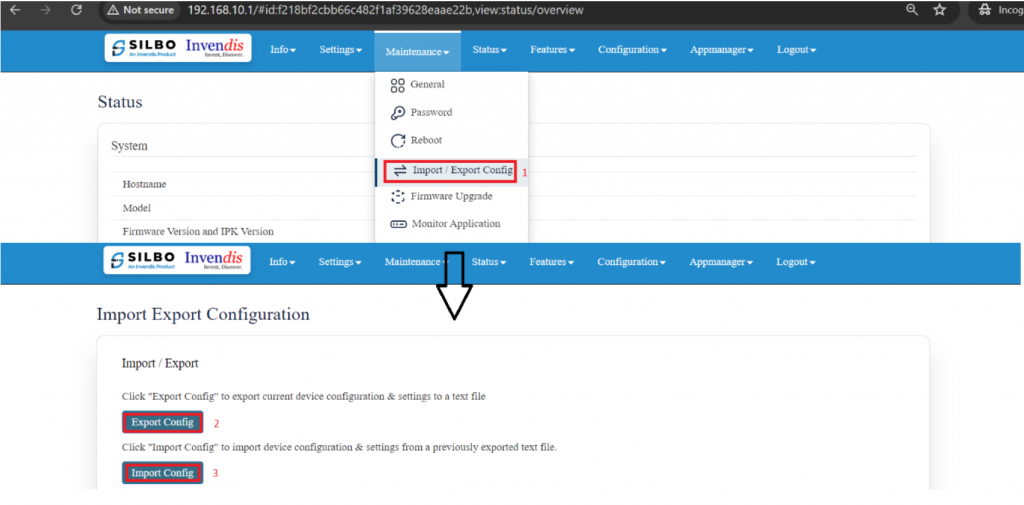
To import files into each router, navigate to maintenance <= Import/Export config.
Export config = Download the existing configuration of the device.
Import config = Upload the downloaded configuration in the device.
 Note: Once Uploaded, keep all the configurations as it is, just change the loopback Ip as required and local subnet Ip should be same as loopback Ip.
Save and Update.
Step 4: Change loopback Ip & local subnet in IPSEC
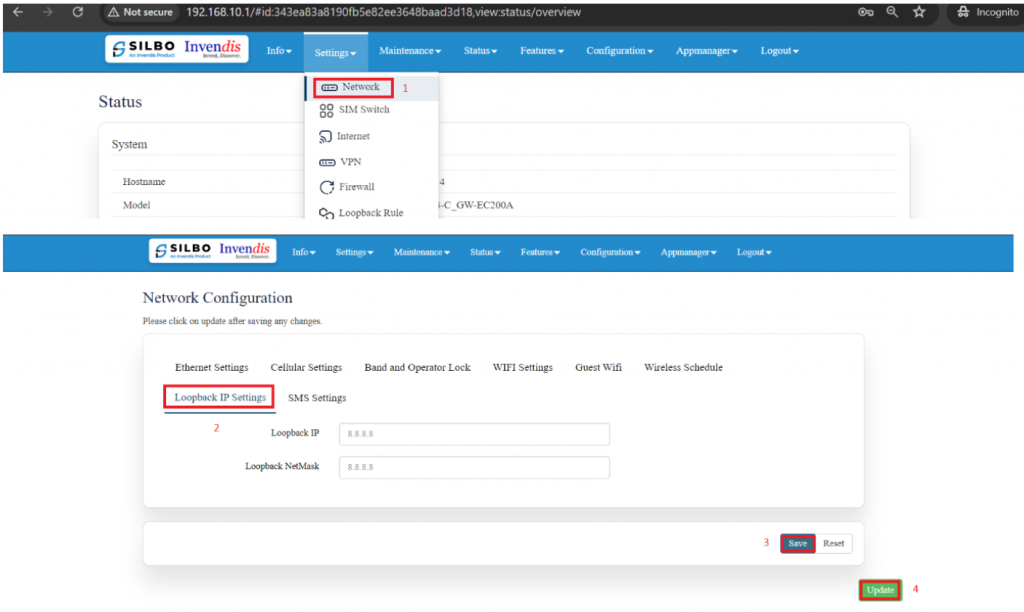
To change loopback Ip, navigate to settings <= network <= loopback Ip settings, change the loopback Ip and netmask.
Save and update.
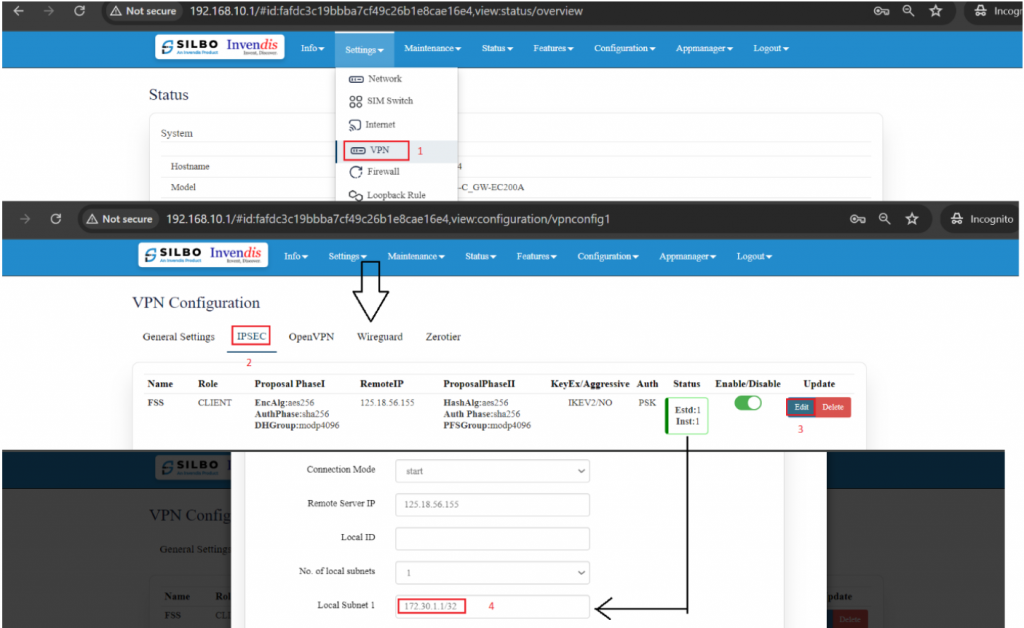
To change local subnet, navigate to settings <= VPN <= IPSEC, click on existing connection, change the local subnet as per the loopback Ip.
Save and update.
Step 5: Check IPSEC status
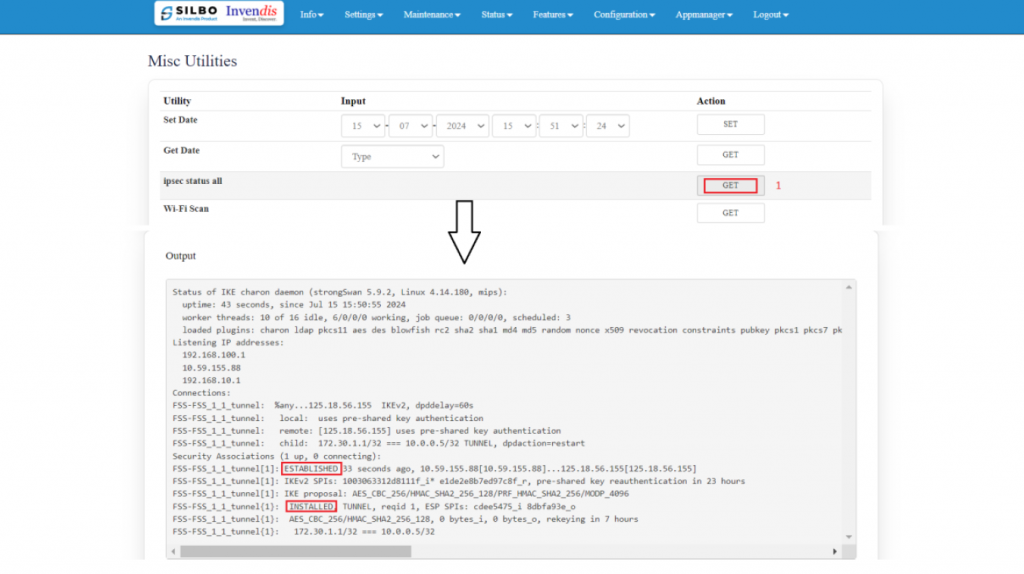
Navigate to features => others, click on “ipsec status all”, the output should show ‘ESHTABLISHED’ and ‘CONNECTED’.
Step 6: Output:
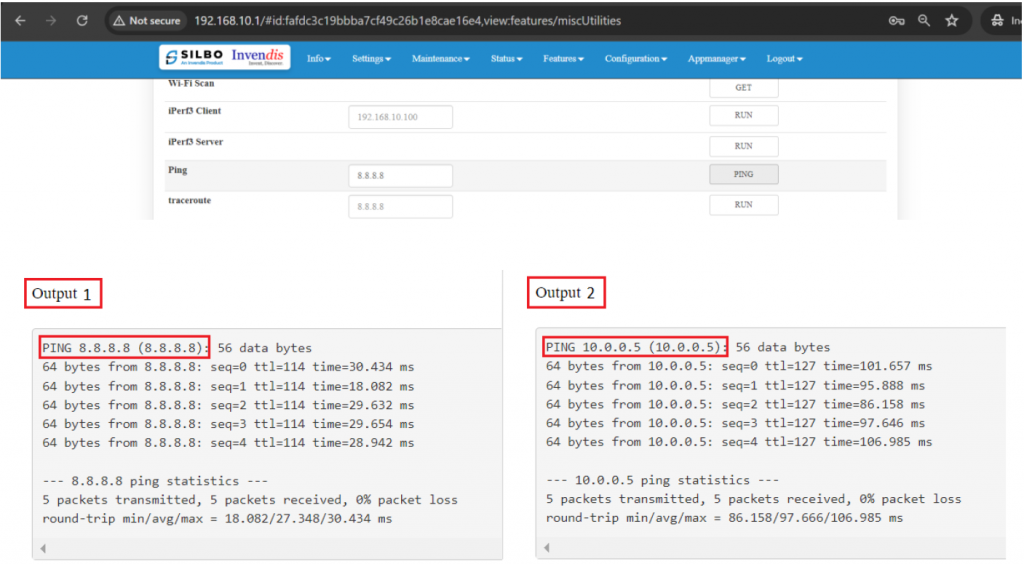
Navigate to features => others => ping,
First check whether the device is connected to the internet, for that ping 8.8.8.8
Second ping the server IP (10.0.0.5)

